Saturday, November 28, 2015

summer reminiscing

purple flower macro

I hope all of my friends in the US had a wonderful Thanksgiving (and that my lovely international friend had a fantastic Thursday!)  My holiday was about as perfect as I could wish for-- lots of time relaxing with family, many, many delicious meals, and it was all topped off with a tree-trimming party at my apartment.  As I'm writing this, I'm curled up on my couch under a blanket, enjoying my Christmas tree as I wait for my tub to fill for a hot, foamy bubble bath.  But today I'd like to go back in time a bit (insert TARDIS sound here) and share some photos from the end of the summer.
blueberries
My mom and I went blueberry picking at her local blueberry farm!  We had read on their website that it was a pretty sparse year for berries, but we weren't discouraged-- and sure enough, we came away with enough blueberries for a pie!  Actually, I want to share a kind of odd experience from that day, because I just couldn't believe it was happening.  My mom and I were picking blueberries, minding our own business, and this couple comes along and starts picking blueberries right next to us.  Like... right next to us.  This blueberry farm has three huge fields full of blueberry bushes, so my mom and I looked at each other like "Ohhhh-kay, this is a little weird."  So then the woman in the couple starts picking from the same bush as my mom!  First she went on the opposite side, then she came around and was literally shoulder to shoulder with my mom.  Why?  Just--- why?!  It was the blueberry picking equivalent of going to a sample sale-- if somebody else has it, it must be good!  We had a wonderful time, though, and finished our excursion with homemade ice cream from the farm's ice cream shop.  
daisies 
My mom has a beautiful flower garden in front of her porch, and I love sitting on the porch with my knitting and watching all of the birds and woodland creatures that come to visit.  My favorite visitors are the group of hummingbirds that hang around.  There are three females and two males, and they're so used to my mom that they fly to eye level a few feet away from her to say hello.  I've always thought of hummingbirds as just whirring wings and a long skinny beak, but they have a lot of personality!  There is no battle more ferocious than two hummingbirds fighting over a flower.  Conversely, there's nothing cuter than a plump little hummingbird preening on a fence post!  Eeeeeep!  So adorable!
moss on log
mossy fallen tree limb in the woods
yarrow
yarrow-- one of my favorite wildflowers
lily

I hope you are warm and cozy on this gray Saturday!  

Saturday, November 7, 2015

flower crowns


flower crown floral design bridal 
Hi friends!  Today I would like to share a project that I did as part of my floral design class.  I created two flower crowns with fresh flowers!  I absolutely loved making these, and two of my lovely coworkers were kind enough to model for me.

flower crown floral design bridal 
Orange isn't usually a color that I'm drawn to, but these incredible orange roses just enchanted me.  I kept this crown simple to let the roses remain the focal point, only adding some greenery and a touch of baby's breath
flower crown floral design bridal 

flower crown floral design bridal 
Color was also the inspiration for my second flower crown.  Since the orange crown is so bright, I wanted my second crown to be a bit more wild and moody.  I fell in love with these deep plum purple carnations, and accented them with purple waxflowers and sprig's of baby's breath.  
flower crown floral design bridal 

flower crown floral design bridal 

flower crown floral design bridal
I so enjoyed making these crowns.  Floral design is incredibly inspiring to me, and I can lose track of hours while I'm working on a floral project.  Creating with flowers is both soothing and exciting to me, and I can't wait to share more of my floral designs with you!

special thanks to Rachel and Alex for being such beautiful models!

Saturday, October 31, 2015

knitting catch-up: JDRF mittens!

One of the many things I love about my job is working for a company that gives back.  In August, we had an in-office carnival to raise money for the Juvenile Diabetes Research Foundation, and of course, the knitters of the office were ready to represent.  Here's what I contributed to our booth!

knit owl fingerless mittens 
These cuties are the Fingerless Gloves With Owl Detail pattern.  I actually knit two pairs of these.  They were quick and easy, and the cable pattern added some interest to the knitting.  The pattern is written to be knit flat, but I modified it to be knit in the round because I am all about avoiding seaming my knitwear.  I knit these mitts (and, actually, everything else in this post) with Berroco Vintage left over from the Never-ending Boyfriend Blanket.  It's a lovely, squishy wool-blend yarn that can be given to non-knitters without fear of shrinking or felting.  Good thing I like it, too-- I still have lots left over!
Emma's Mittens knitting 
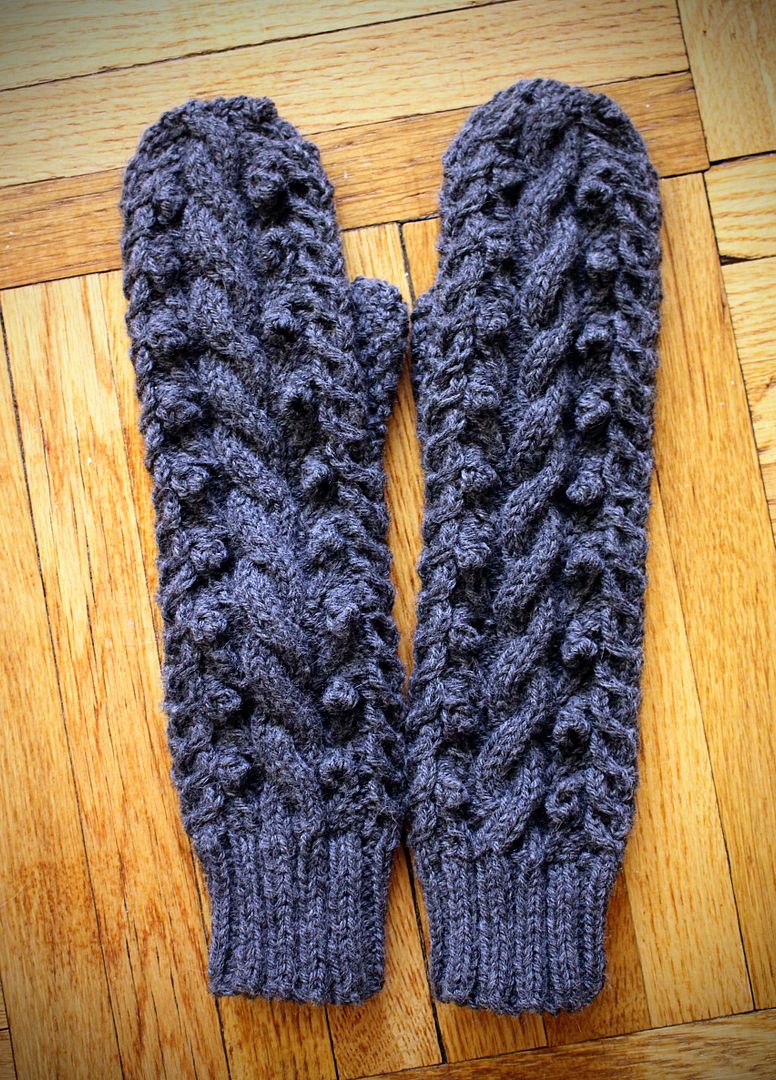
Next up is a pair of Emma's Mittens! These were super fun to knit, and Emma's Mittens will definitely become one of my go-to mitten patterns.  There's definitely a lot going on in this pattern, what with all the cables and the many, many bobbles, but the pattern repeat is short enough that the knitting seems to fly by.  I knit these while sitting on my mom's porch, watching hummingbirds darting around her flower garden.  
Emma's Mittens fingerless knitting 
Another pair of dark gray Emma's Mittens, but fingerless!  These were actually a custom request from one of my coworkers.  She loved the dark gray Emma's Mittens in the knitting club booth, but she felt that a fingerless version would work better for her.  I was happy to knit them up for her-- apparently, this particular coworker always buys lots of handknits from the knitting club's booth at the JDRF carnival.  How cool is that?  I love knitting for other people who work in creative fields or have creative hobbies, because they truly understand how much time and thought and love goes into every handmade object.  
Emma's Mittens knitting Emma's Mittens knitting cables
Last up, a pair of Emma's Mittens in a lovely robin's egg blue!  It was a wrench putting these into the booth, because I love this color and thought these mittens turned out particularly pretty.  Lucky for me, they were the only thing I made that didn't sell!  So now they are mine, mine, mine.  Yay!  I also knit a bunch of little mug cozies, and it has been so much fun seeing them snuggled around mugs on desks in the office.  

Happy Halloween!  I will be spending the day curled up with Bucky and Cocoa, watching Halloween movies and knitting away on Christmas presents.  I hope your day is cozy (or spooky, whichever you prefer)!

Monday, May 11, 2015

hand-tied bouquet

Hi there!

I've always loved flowers-- I grew up spending a lot of time outside, and when I was in college, I went up to the High Line almost every week to get a little time with nature.  Flowers have always been a huge influence on my fashion design work, too.  I recently enrolled in a floral design class on Nicole's Classes, taught by Chelsea Fuss of the lovely Frolic! blog.  Today I'd like to share the first assignment with you!

The first assignment was to make a hand-tied bouquet.  The flowers I chose for my bouquet were yellow and pink ranunculus, purple mini-carnations, pink spray roses, yellow freesia, white waxflower, and spirea.  

hand tied bouquet flowers ranunculus roses
I wanted my bouquet to look lush, but maintain a fresh, garden-y feeling, so I also put in a few unopened buds from the carnations.  The wispy waxflower and slightly wild-looking eucalyptus, as well as the curvy spirea, also give the bouquet a more organic look.

hand tied bouquet flowers ranunculus rose

I had purchased enough flowers for a couple bouquets-- here is the second one.  I was especially pleased with the pink ranunculus in this bouquet- I love how full and round they look! 
hand tied bouquet

 After about a week, some of my flowers were starting to look a little worse for wear, so I took out the ones that still looked fresh and rearranged them into this cute little row of mason jars.  
flowers in mason jars ranunculus

ranunculus pink

yellow ranunculus

I'm currently in the third week of the class and absolutely loving it.  It's so soothing and lovely and inspiring to be working with beautiful, natural forms and textures.  I can't wait to share more of my floral design work with you!

Tuesday, April 21, 2015

tattoo tips

Hi guys!

I recently got my second tattoo.  My brother and I have been wanting to get tribute tattoos in memory of our father, and about two months ago, we made it happen.

acorn tattoo rachel hauer
My acorn is on my left wrist.

rachel hauer east river tattoo acorn
Zach's acorn is on his left forearm.

Our tattoos were inspired by a sketch of an acorn, found in one of my dad's old sketchbooks.  The acorn was a fitting metaphor for the way we were raised-- in a farmhouse in the forest, free to learn and grow in the most nurturing environment we could ever have asked for.  I wanted to add an oak leaf to mine, to symbolize the potential that is created when the acorn is cared for as lovingly as my brother and I were cared for.  Zach wasn't sure if he wanted a leaf, but when our amazing artist did a sketch of how it could look, he decided to go for it, too.

This was my second tattoo-- the first was a tiny green sewing button on my ankle, which I got right before I graduated from FIT.  Tattoos are fascinating to me-- there are as many different tattoo styles as their are tattoo artists.  As an introvert, tattoos are also a great way to connect with people.  I don't like small talk, but it's often hard to find a natural way to move straight to 'big talk.'  Most people are excited to talk about their tattoos, and they often reveal a lot about the person, their past experiences, and what they value in life.  It's a way to connect on a deeper level than talking about the weather or tv shows, but it doesn't feel overwhelmingly personal and intrusive.

Alright, so now that you've heard a little bit about my experience with tattoos, I'd like to share some tips for if you're thinking about getting some ink of your own! (Do people still call it 'ink?' Is that passé?  I still like it, it sounds thoughtful and slightly old-fashioned.  I'm going with it.)

-Find an artist whose work inspires you.  Since this is a piece of art that will be on your body for the rest of your life, it's super important to feel confident in your artist!  My button tattoo was done by Wendi Koontz at Rising Dragon Tattoo, who has now moved back to Ohio and started her own shop, South Water Studios!

tattoo wendi koontz

tattoo wendi koontz

These photos of Wendi's work, courtesy of the South Water Studios Facebook page, are indicative of my taste in tattoo artists-- I go for delicate, precise lines and gentle shading, and I like when an artist has a strong portfolio of botanical work since that's my preferred subject matter.

My brother and I got our acorn tattoos from Rachel Hauer, from East River Tattoo in Greenpoint, Brooklyn.  I've been following Rachel's work for a couple years, and her work has this gorgeous, organic quality which I just love.  These are a few snaps from her instagram (which is super inspiring and you should definitely follow her!).

rachel hauer tattoo 

rachel hauer tattoo

-Be clear about what you want.  When you go in for your consultation, bring reference images and have a thorough discussion with your artist.  If you're getting a bird, bring in a photo of the kind of bird that you'd like, preferably in a similar position.  This is especially true for ideas that need to have scientific accuracy.  For instance, if you want to get a tattoo of a particular kind of plant, make sure to bring in enough photos to cover both the overall look and the smaller details like leaf shape or petal curvature.  The research is part of your job, not part of the artist's job.  The process will be much smoother if you're able to give your artist a clear idea of what you're looking for!  With that said, though, try not to bring in photos of a different artist's tattoos-- it's a sure way to get off on the wrong foot with your artist.  Nobody wants to try to make their work look like someone else's and if you've chosen an artist whose style speaks to you, you should have confidence in their ability.

-Consider whether the tattoo placement you've imagined will work with your lifestyle.  This one might seem obvious, but if you work in a very conservative office environment, where there is still some stigma attached to having a tattoo, consider whether you will easily, comfortably be able to cover it up.  I'm lucky enough to work in a creative field where tattoos are completely acceptable, but it's definitely something to keep in mind.

Ok, so you've chosen an amazing artist and had a great consultation.  Here are my tips for the big day!

-Take two Tylenol 30 minutes before your appointment.  Everyone's pain tolerance is different, but if you're at all concerned about the pain of getting a tattoo, try taking two Tylenol or other acetaminophen painkiller half an hour before your appointment.  It's really important that you don't take aspirin or an aspirin-based painkiller, though, because those will thin your blood and make your tattoo bleed more both during and after your appointment.  Honestly, I'm kind of a wuss (as in, I literally cry if I have to get blood drawn), but a few minutes into the tattoo, endorphins kick in and it isn't too bad.  But the endorphins don't last for the entire duration of the tattoo, and it does help to have some back-up.

-If you are squeamish at all, don't watch while the artist works on your tattoo.  Obviously, this means you need to trust your tattoo artist-- which you should anyway because, hi, they are using a needle to put permanent marks on your body.  I am an extremely squeamish person, but I have no problem getting tattooed because I don't watch while it's happening.  I like the before and the after-- but not the 'during' stage.  I prefer to look up at the ceiling, take deep, calming breaths, and get 'in the zone' for lack of a better term.  It can also help if you have a friend with you to keep you distracted!  I'm so glad my brother and I were there to distract each other during our recent tattoo appointment.  And it didn't hurt that East River Tattoo has the cutest little dog with distractingly adorable antics.

east river tattoo dog

Yay, you have a beautiful tattoo!  Now what?

-Follow your artist's instructions!  Your tattoo artist will most likely tell you to wash your tattoo two to three times a day with antibacterial soap, then to apply a healing salve like Aquaphor.  Make sure to follow your artist's instructions!  If your artist tells you to keep your tattoo away from any abrasive surfaces, like shirt sleeves or jeans, for crying out loud, take it seriously.  If your artist tells you to keep your tattoo out of the sun (which they probably will), listen to what they suggest.  These things sound small and nit-picky, but it's absolutely worth it to deal with a few little inconveniences in order to have a beautiful piece of art on your body forever.

-Your first night with your tattoo: how to avoid ruining your sheets.  Ok, so this is a little gross, but you will still have some excess ink and various yucky body-healing substances sneaking out of your new tattoo by the time you're ready to go to bed.  To be totally practical here, wear dark pajamas that won't cover your tattoo and keep air from circulating.  Put some dark colored sheets on your bed.  Make sure to gently but thoroughly wash your tattoo with antibacterial soap-- don't scratch or scrub, obviously, but make sure that nothing is scabbing up.  You need to make sure that you don't have extra plasma (ew!) on your tattoo, which could cause it to scab and lose some of your color or line definition.  When it's all clean, pop some Aquaphor on it and gently rub it in.  You only need a thin layer, no need to goop it on!   I have the unique gift of staying completely still in my sleep, so rolling around isn't too much of a problem for me,  but if you do roll around a lot, try to position yourself in a way that will be the least abrasive on your tattoo.  For instance, when I got my acorn tattoo on my left wrist, I kept my left arm on top of my covers and the rest of my body underneath them, so that i didn't rub it in my sleep.

-After two to three days, switch to a lighter lotion.  Aquaphor is perfect for the first two or three days-- it gives your tattoo a jump-start on the healing process.  After that, though, it can be a little too heavy and sticky for routine moisturizing.  I like to use Aveeno's fragrance-free lotion because it's light, doesn't clash with my perfume, and keeps the skin over your tattoo feeling supple.

-Love your new tattoo and take other people's opinions of it with a grain of salt.  Assuming your tattoo came out just how you hoped, you're probably going to hope that everyone who sees it will be just as excited about it.  They might not be.  Some people will have different aesthetic preferences from yours, and some people just don't like tattoos in general.  And some people have no problem expressing their opinion, regardless of whether you asked for it.  (My personal favorite was being told that 'young ladies shouldn't have tattoos' by a stranger in line at Walgreens.  Because obviously women's bodies are public property and should be commented on at every opportunity.  But that's a different discussion.) Your opinion of your new tattoo is the only one that matters.  If you're thrilled with it, don't let someone else's feelings sway you.

I hope you've enjoyed a little peek into my tattoo experiences, and I hope that this post has helped you a bit if you're in the process of getting your own tattoo!  I'd love to hear about your experiences and tips!


Sunday, February 15, 2015

the never-ending boyfriend blanket

Hi guys! 

Today I'd like to show you the biggest knitting project I have ever done-- a Vivid blanket for my boyfriend.  Now that we've exchanged gifts and I won't ruin the surprise by showing photos, I'm so excited to be able to share this labor of love!  It got its name, The Never-Ending Boyfriend Blanket, because I started knitting on it in early November and kept knitting on it until the end of January!  I guess objectively that isn't a particularly long time to be knitting a blanket, but when you knit exclusively in 4 colors, all of which are shades of grey and blue, for three months... well, it seems like a while.  I went to Vogue Knitting Live while I was in the midst of knitting this blanket, and in rebellion against the grey and blue, I bought oodles of pink and purple sparkly yarn and fiber.  But more on that at a later date. 

I didn't want my fella to have to worry about hand-washing this blanket, so I knit it out of Berroco Vintage.  The fiber content is 50% acrylic, 40% wool, and 10% nylon.  I'm not generally a fan of blends including acrylic, but the Vintage was lovely to work with.  I'm actually planning another Vivid for myself in the same yarn!


tin can knits vivid blanket berroco vintage 
The Vivid squares traveled with me everywhere, including on the trip to my mom's house in Pennsylvania.  This was a very cozy day, knitting in front of a fire and listening to audiobooks.  

tin can knits vivid blanket berroco vintage 
In the end, I knit thirty squares.  They filled my entire bathtub when I soaked them in preparation for blocking!  My current blocking board situation only allowed me to block 8 squares at a time, so there may have been some creative drying methods to speed along the process.  A hair dryer was, perhaps, involved, as well as an intricate arrangement of blocking boards around my bedroom radiator.    

tin can knits vivid blanket berroco vintage 
I finished the blanket the night before Christian arrived in New York.  Bucky became very attached to it.  He was not pleased when I took it away!  It's not like he is lacking for blankets, either.  Every blanket that is supposed to be for me gets claimed by the cats as it is!  But of course, all other blankets paled in comparison to the only one he couldn't have.  

tin can knits vivid blanket berroco vintage
The finishing touch on this blanket was a little copper heart charm, a very tiny one so that only Christian will know where it is.  

The best part of this whole project was Christian's reaction when I gave him his blanket.  He melted my heart by choosing it over a fluffy hotel duvet when we snoozed after a long walk.  Mmhm, he is most definitely knit-worthy.  

Project details!
Pattern: Vivid by Tin Can Knits
Yarn: Berroco Vintage 
Yardage by Colorway: 1302 in Cracked Pepper, 325.5 in Smoke, 271.25 in Gingham, and 271.25 in Tide Pool.
Total Yardage: 2,170 yards total (!!!) 


Friday, January 2, 2015

o christmas tree

Happy New Year!
I don't know about you guys, but I am still in the holiday mood.  I still want to deck the halls and walk in a winter wonderland!  To that end, I'd like to share a little video of some of my favorite Christmas ornaments!


(Please set the quality to 480p! The resolution went way down when I uploaded to youtube. womp wommmmp.)

The etsy seller I mentioned in the video is VintageBarnYard.  She is on vacation right now, but it looks like she still has a lot of vintage Christmas stuff!

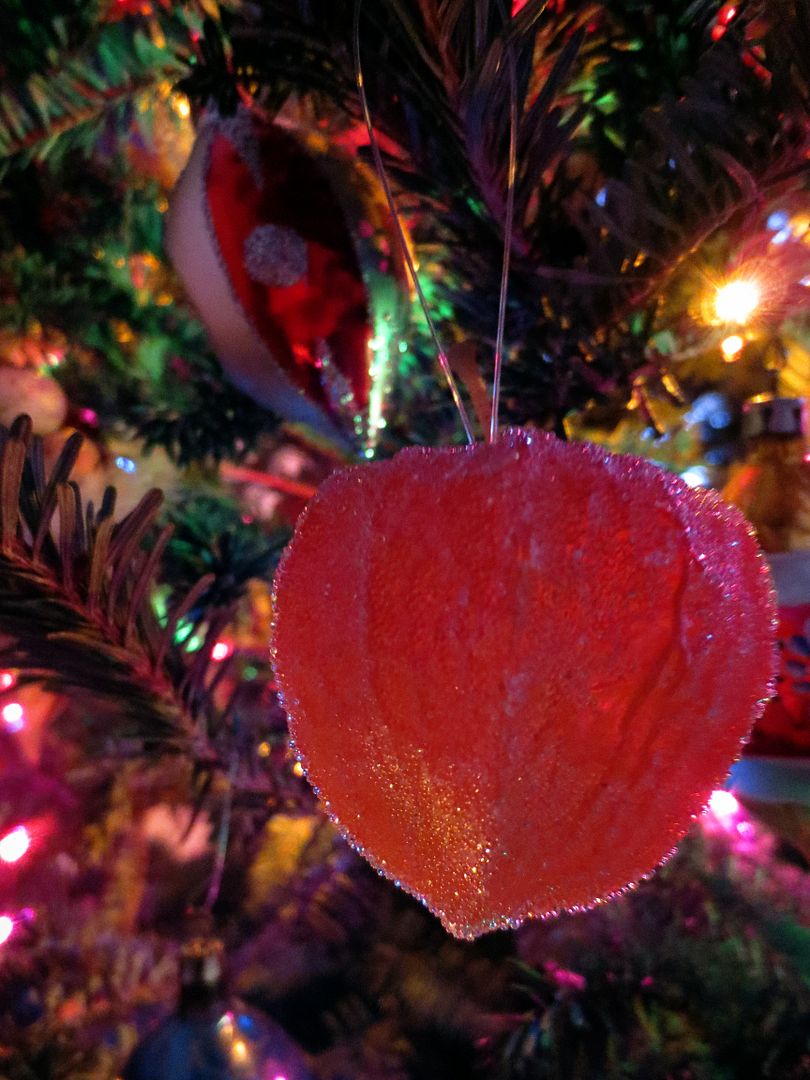
vintage christmas ornament glass acorn christmas ornament vintage pinecone christmas ornament vintge christmas ornament lantern flower christmas ornament
Now it's time for me to make a cup of tea and curl up in front of my tree with some knitting.  Yay!
I hope you have all had the coziest, sweetest holiday season!